
Glazed donut nails are all about that chic, minimalist look.Think of a sheer, milky base colour with a pearlescent chrome finish layered on top, giving it a subtle, light-catching sheen that looks just like the glaze on a fresh doughnut. It's become the ultimate choice for anyone after that sophisticated, 'your-nails-but-better' vibe.
Why Glazed Donut Nails Are a Modern Classic
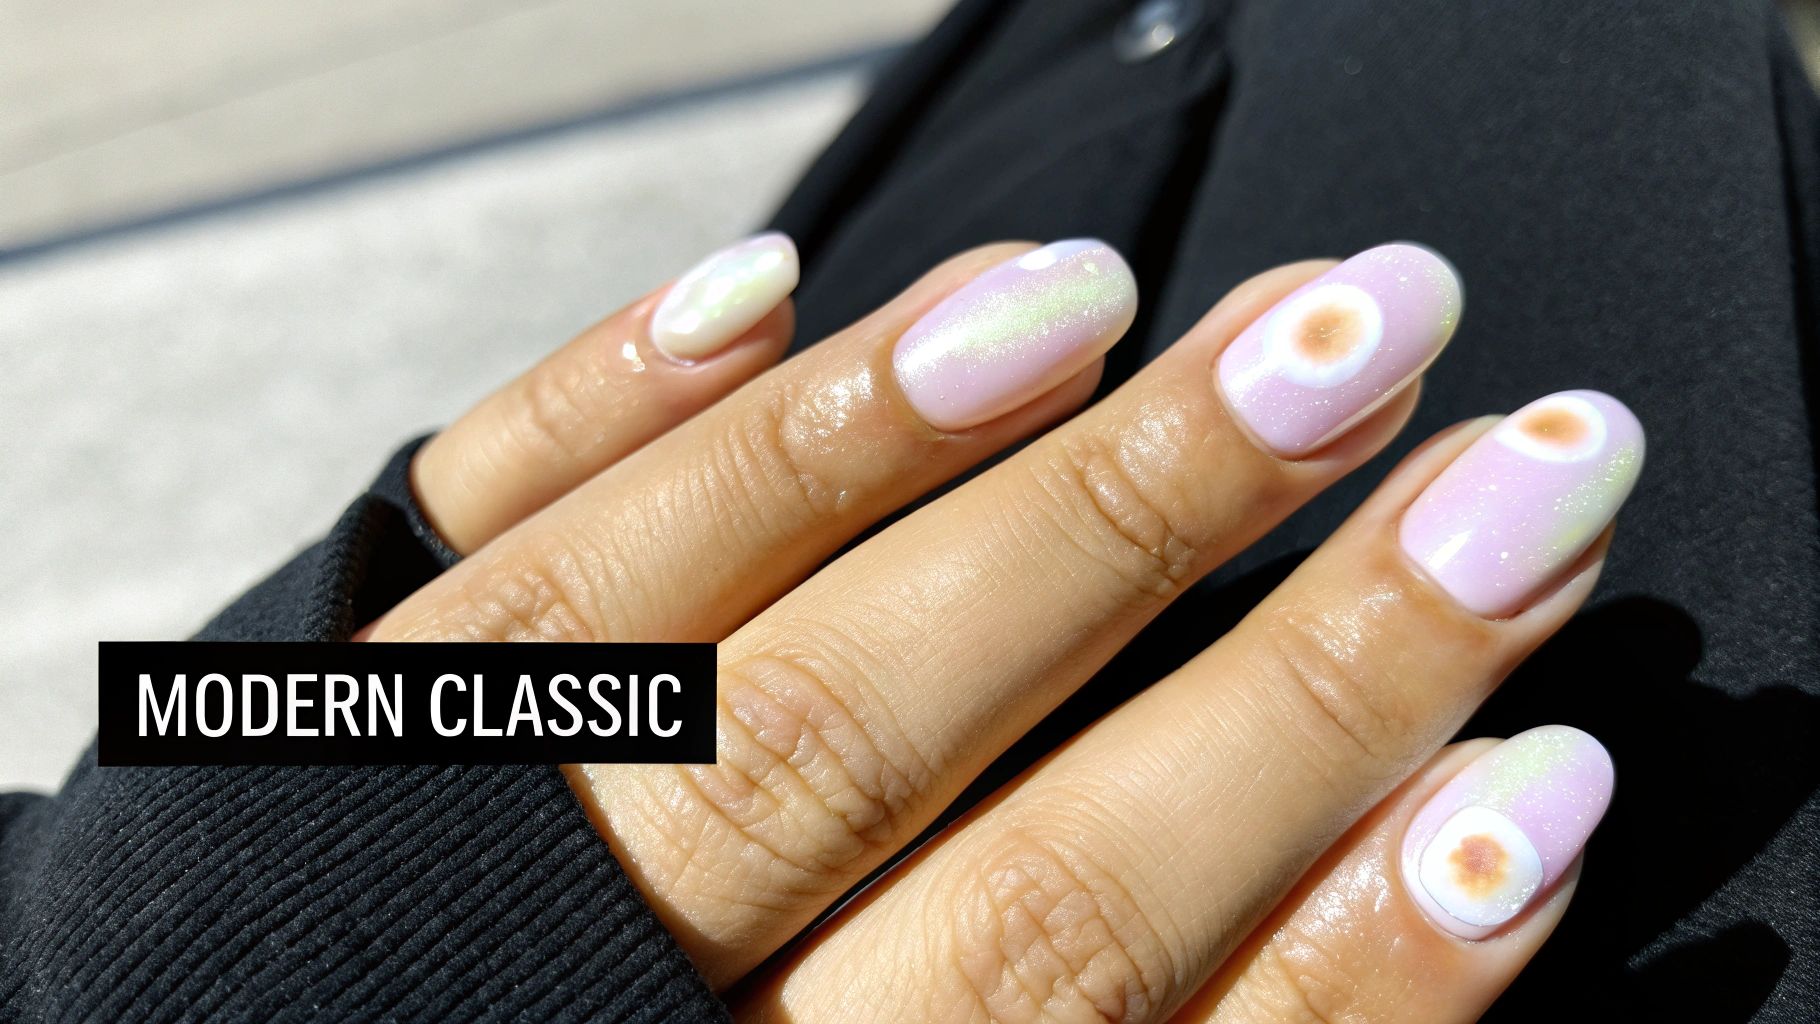
What started out as just another viral trend has now cemented its place as a true modern classic in the nail world. The whole glazed donut aesthetic is loved for being incredibly versatile and subtly elegant. It's no longer a fleeting social media moment; it's a staple request in salons and a go-to for DIY manicures.
The real magic is in its sophisticated simplicity. Unlike loud, complex designs, this look just enhances the natural nail, giving it a luminous, healthy glow. It fits right in with the popular 'clean girl' aesthetic, which is all about looking polished and effortlessly put-together.
The Rise of Understated Elegance
The lasting appeal of trends like this doesn't just catch on with individuals; it has a real impact on the nail care industry, from what services people ask for to how salons run their day-to-day. If you want to get a sense of the business side, it's worth understanding the challenges nail salons face during peak hours.
This trend is also part of a bigger shift towards quality and consciousness in beauty. In the D-A-CH region, for example, the nail care market is growing by 4.2% each year. This is fuelled by a 28% jump in searches for 'glazed donut nails' on Swiss e-commerce sites. One recent survey even found that 73% of women who tried the look specifically chose gel polishes with ECOCERT-compliant certifications, showing a clear demand for cleaner ingredients. You can dive deeper into these market insights over on Statista.
This manicure hits that perfect sweet spot. It’s more interesting than a simple nude polish but still professional and chic enough for any setting, whether it's a boardroom meeting or a weekend brunch.
Prioritising Nail Health and Quality
Getting that signature iridescent finish isn't just about the technique—the products you use are just as important. The very best results come from high-quality, ethically sourced materials that not only deliver a flawless look but also keep nail health front and centre. This way, you get a beautiful manicure that feels as good as it looks.
- Subtle Sophistication: It offers a polished look that never feels over the top.
- Versatile Style: It works with any outfit, season, or event you can think of.
- Healthy Appearance: The sheer base gives the illusion of naturally strong, perfect nails.
At the end of the day, the glazed donut nail is more than a style; it's a statement of refined taste. It’s proof that sometimes, the most powerful beauty looks are the ones that whisper instead of shout.
Building Your At–Home Nail Toolkit
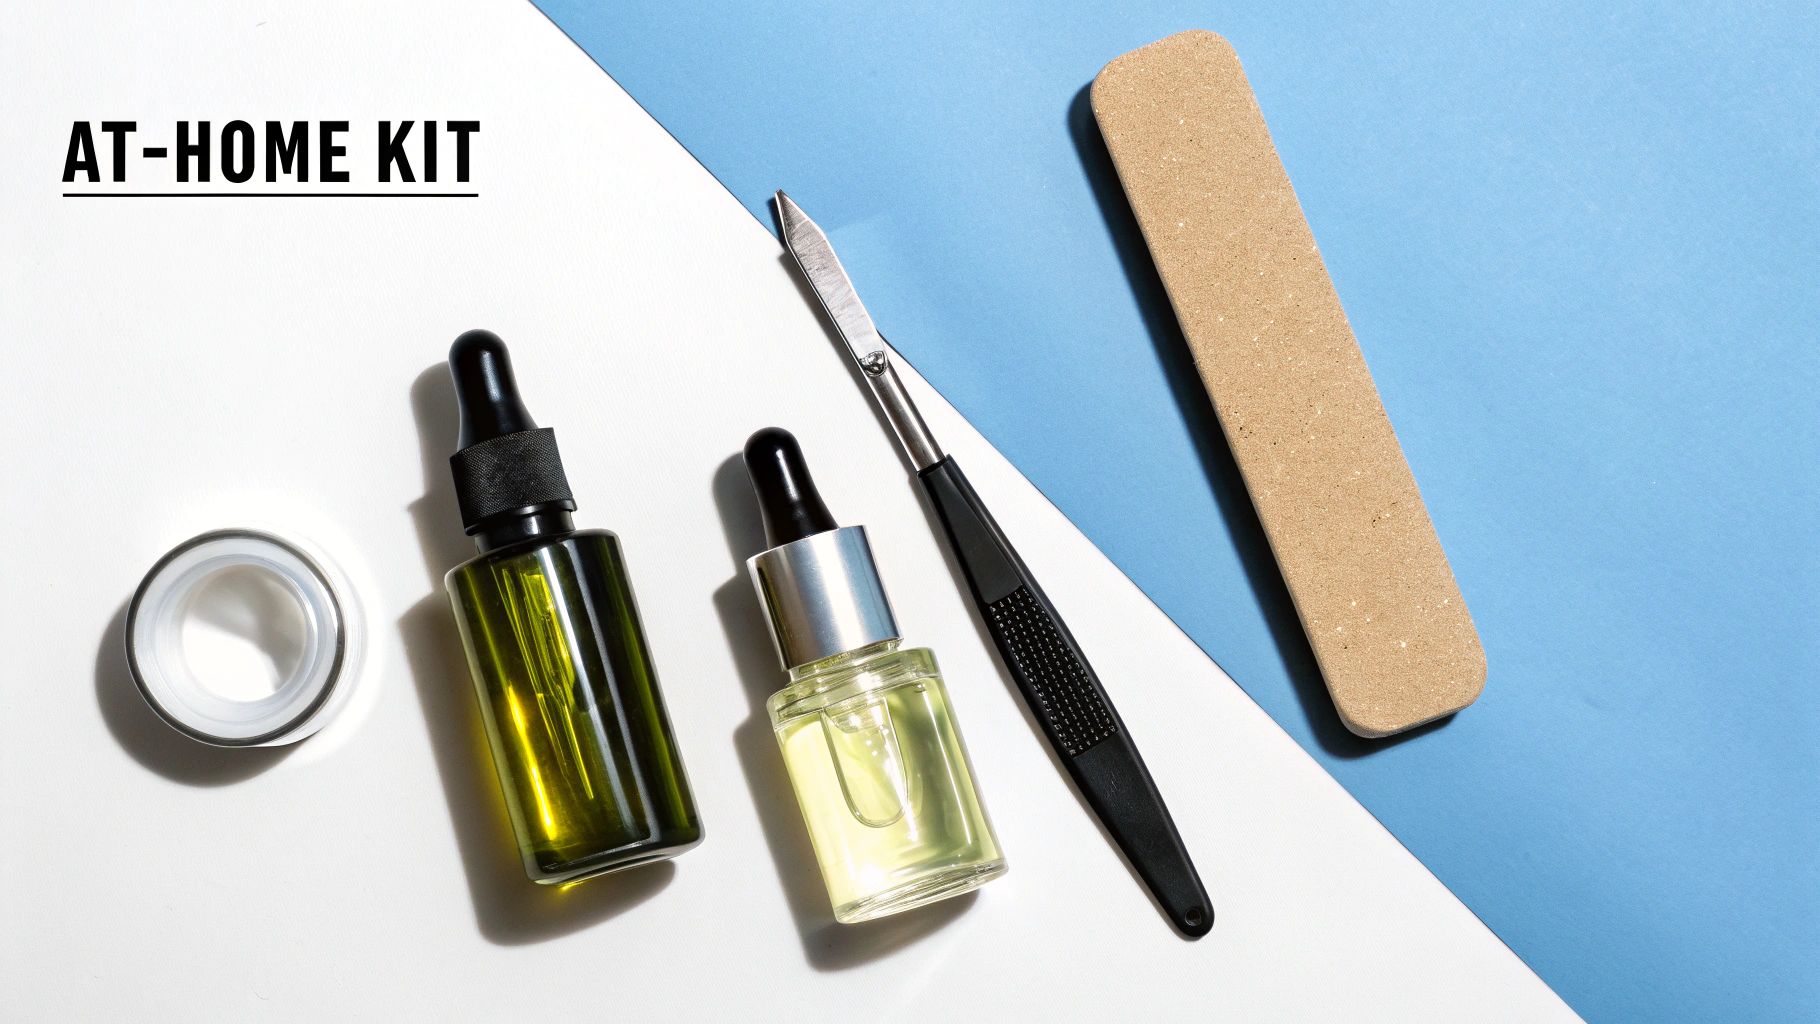
Getting that flawless, salon-quality finish right in your own home is completely achievable, but it all starts with having the right tools on hand. Think of it like a chef prepping their ingredients—gathering everything you need before you start makes the whole process smoother and honestly, a lot more fun. This first step is all about setting yourself up for success.
Your Core Manicure Must-Haves
Before we even get to the fun colours and chrome, let's talk about the absolute essentials. These are the non-negotiable tools that lay the groundwork for any great manicure, especially one that needs to be as perfect as this.
- Gentle Nail File: I always recommend a glass file or a fine-grit emery board (240-grit or higher). These are much kinder to your natural nails and help you shape them precisely without causing splitting or peeling.
- Nail Buffer: A good multi-sided buffer is your best friend for creating a perfectly smooth canvas. It helps to gently even out any ridges on the nail surface so your polish goes on like a dream.
- Cuticle Care: A wooden or stainless steel cuticle pusher will help you gently ease back your cuticles. Keep a nipper handy, but only use it for trimming away any annoying hangnails, not the cuticle itself.
- Cuticle Oil: This is the finishing touch. A good, nourishing cuticle oil not only makes your manicure look professionally done but also keeps the skin around your nails hydrated and healthy.
The Magic Ingredients: Polish and Powder
Now for the part that creates the signature glazed look. The biggest choice you’ll face is whether to go with gel polish or stick to traditional nail varnish. Gel is what the pros use for this look because of its incredible durability and how perfectly it works with the chrome powder. But don't worry, you can still get a stunning result with regular polish if that’s what you prefer.
The key to that iconic glazed donut nail is the sheer, milky base. You’re looking for polishes often described as "jelly" or "sheer." A classic like OPI’s 'Funny Bunny' is a go-to for many because it gives you that perfect translucent white. The idea is to have a soft wash of colour that lets your natural nail just peek through.
And for the pearly sheen? That comes from a very specific product: cosmetic-grade chrome powder. This isn't your average glitter. You need a powder labelled "white pearl" or "aurora" to get that subtle, light-catching glow.
Pro Tip: If you're using gel, a "no-wipe" top coat is absolutely essential. It cures to a perfectly smooth, non-tacky surface. This is the secret to getting the chrome powder to buff into a seamless, mirror-like finish instead of clumping up into a glittery mess.
To make it easier to see what you need, here's a quick breakdown of the essentials for both gel and regular polish manicures.
Essential Products for Glazed Donut Nails
| Product Category | Gel Manicure Essentials | Regular Polish Alternative | Key Feature to Look For |
|---|---|---|---|
| Base Colour | Sheer white or pink gel polish (e.g., OPI Funny Bunny) | Sheer white or pink nail varnish | A "jelly" or "milky" finish for translucency |
| Top Coat | No-Wipe Gel Top Coat | A high-gloss, quick-dry top coat | For gel: No-wipe is crucial. For polish: High shine. |
| Glaze Effect | White pearl or aurora chrome powder | A pearlescent/iridescent top coat or sheer polish | The chrome powder provides the most authentic effect. |
| Curing | UV or LED Nail Lamp | Air drying | A lamp is required for all gel products to set properly. |
Choosing between gel and regular polish really comes down to your preference for longevity and the application process you're most comfortable with.
Elevating Your Kit with Mindful Choices
Beyond just getting the job done, you can also think about the quality and ethics of the products you're bringing into your home. It’s becoming easier than ever to find brands that create fantastic, high-performing products without compromising on their values.
When you're shopping, keep an eye out for brands that are certified cruelty-free by organisations like PETA or use ECOCERT-compliant ingredients. For instance, seeking out distributors like beautysecrets.agency can connect you with cosmetics that are carefully selected for their clean formulas and ethical standards. That way, you can feel just as good about the products you're using as you do about your beautiful new manicure.
Laying the Groundwork for a Flawless Manicure
A truly beautiful manicure starts long before you pick up a colour. Think of it like an artist prepping a canvas—getting the foundation right is the most crucial step for that stunning, long-lasting glazed donut look. This stage is all about care and precision.
So many at-home manicures go wrong simply because this part gets rushed. A perfectly prepped nail doesn’t just look infinitely better; it also grips onto the polish, fighting off chips and lifting for days longer.
Shape and Buff for a Glass-Like Surface
First things first, let’s get the shape right. Whether you love a chic almond, a timeless oval, or a trendy squoval, consistency across all your nails is what you're aiming for. Grab a fine-grit file—a 240-grit is perfect for natural nails—as it prevents creating tiny, invisible tears. Always file in one direction, moving from the side to the centre. That sawing motion we all do? It’s a major cause of weak, peeling nails.
Once you’re satisfied with the shape, give the nail surface a very gentle buff. You’re not trying to thin the nail at all. The idea is simply to erase any natural oils and create a slightly matte texture that your base coat can really cling to. Honestly, this one little step is a game-changer for making your manicure last.
Tidy Up Your Cuticles
Clean, healthy cuticles are what separate a good manicure from a great one. Start by dabbing on a bit of cuticle remover to soften everything up. Let it sit for about a minute, then take a wooden stick or a metal pusher and gently ease the cuticles back off the nail plate.
A Quick Word of Caution: Resist the urge to cut the living tissue (the eponychium). That little seal of skin is your nail's best line of defence against infection. Only use a pair of sterilised nippers to snip away any obvious hangnails or bits of dead, flaky skin.
Getting this right frames your nail beautifully and stops polish from pooling in the sidewalls, which is a fast track to lifting. It’s the secret to that polished, just-left-the-salon finish.
Building the Translucent Base
With the prep work done, it's time to build that signature translucent quality that defines glazed donut nails.
Don't Skip the Base Coat: This is non-negotiable. A good base coat acts as a shield, preventing pigments from staining your natural nail. More importantly, it gives the colour something tacky to hold onto, which is key for longevity.
Apply the Sheer Colour: Now for the fun part. Brush on one thin layer of a sheer, milky-nude or a pale, soft pink. The goal here is a wash of colour, not full coverage. You want to even out your nail tone but still let the natural nail show through. Polishes with a "jelly" finish are absolutely ideal for this.
These first layers create that delicate, ethereal glow from within. By taking your time here, you’re guaranteeing a professional-looking manicure that truly shines.
Mastering the Pearlescent Chrome Finish
This is where the real magic happens. Getting that authentic, luminous sheen of glazed donut nails isn't about one magic product—it's all about technique. It might look complex, but it's an art you can definitely master once you nail down a few key details.
The entire effect hangs on one crucial step: applying a fine, pearlescent chrome powder over a perfectly prepared gel base. Your goal is to take a simple manicure and elevate it into something that catches the light with a soft, ethereal glow, just like the delicate glaze on a fresh doughnut.
Before you even think about the chrome, your foundation has to be flawless. This visual guide breaks down those essential early stages: shaping the nail, applying the base coat, and then adding your sheer colour.
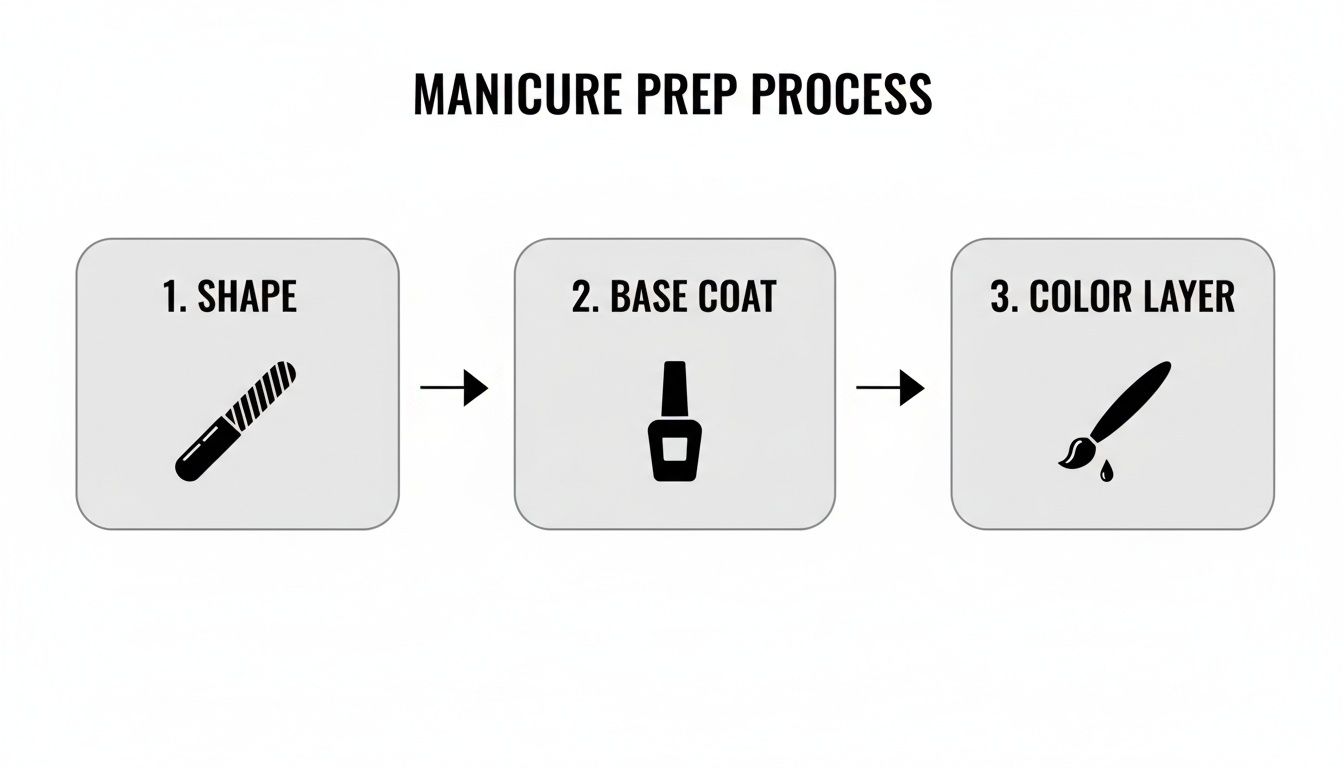
Getting these initial steps right is what allows the chrome powder to glide on smoothly and lock in place for a long-lasting, perfect finish.
Choosing Your Chrome Powder and Applicator
The powder you choose will make or break the look. For that classic glazed effect, you'll want to hunt down a white pearl or aurora chrome powder. These are ground incredibly fine, which is what creates that reflective sheen instead of a chunky, glittery sparkle. Some powders even have a subtle pink or blue shift, which is a fantastic way to customise the look.
Believe it or not, your applicator matters just as much as the powder itself. While many chrome kits come with a tiny disposable eyeshadow sponge, many pros have their preferred tools for better control and a smoother result.
- Silicone Applicator: This is my personal favourite. It’s brilliant for burnishing the powder right into the nail because it doesn't absorb any product, so nothing goes to waste. The smooth surface really helps create that seamless, mirror-like finish.
- Eyeshadow Sponge: This is a solid choice, especially if you're just starting out. It picks up the powder easily and helps you apply gentle, even pressure without much fuss.
- Gloved Finger: You’ll see some seasoned nail artists swear by this method. Using a gloved fingertip gives you amazing tactile feedback, allowing you to feel the pressure you're applying. It can be incredibly effective for buffing the chrome to a high shine.
The Critical Role of Timing and Top Coats
Here's the secret weapon for a perfect chrome application: a no-wipe gel top coat and impeccable timing. A regular top coat leaves behind a sticky inhibition layer after curing, which will make the powder clump and look gritty. A no-wipe formula, however, cures to a perfectly smooth, non-tacky surface—the ideal canvas for chrome.
Now for the most important tip I can give you: apply the chrome powder immediately after the no-wipe top coat has cured. The nail will still be warm from the lamp, and this warmth is what helps the powder almost melt into the surface, creating that flawless, burnished effect. Wait too long, and it just won't stick the same way.
Pro Tip: Cure the no-wipe top coat for the exact time the manufacturer recommends. This is usually 30-60 seconds in an LED lamp. If you undercure it, it'll be too sticky. If you overcure it, the surface can become too slick for the powder to properly adhere.
Once you’ve buffed the powder onto the nail until it shines like liquid pearl, you need to seal it all in. Take a soft, fluffy brush and gently dust away any excess powder from around the cuticle and the free edge.
Next, apply a final layer of your no-wipe top coat. Make sure you cap the free edge to prevent chipping! Cure this final layer, and your glazed masterpiece is complete. This two-layer top coat method—one under the chrome and one over it—is what gives glazed donut nails their signature depth and durability.
How to Make Your Glazed Manicure Last
You’ve put in the work to get that perfect set of glazed donut nails, so now the goal is to keep that luminous sheen looking flawless for as long as possible. The secret to a long-lasting manicure—especially one with a delicate chrome finish—isn't complicated. It all comes down to consistent, thoughtful aftercare.
Honestly, it’s the simple daily habits that make the difference between a manicure that chips in three days and one that’s still going strong after two weeks. You don't have to put your life on hold; just work a few protective rituals into your routine.
Daily Habits for Manicure Longevity
The biggest enemies of a fresh manicure are usually water and harsh chemicals. When your nails are soaked in water for too long, they expand, which can cause the polish to lift and peel right off the edges.
This is where rubber gloves become your best friend. Popping on a pair before you tackle the washing up or use any household cleaners is a game-changer. Those chemicals can strip the shine right off your top coat and weaken the polish, so that simple barrier is your best line of defence.
Another thing to watch out for is your skincare. Many products, especially those with potent ingredients like acids or retinoids, can be surprisingly tough on a top coat, causing it to go dull. Just be mindful when applying them—try to use the pads of your fingers instead of your nails to keep contact to a minimum.
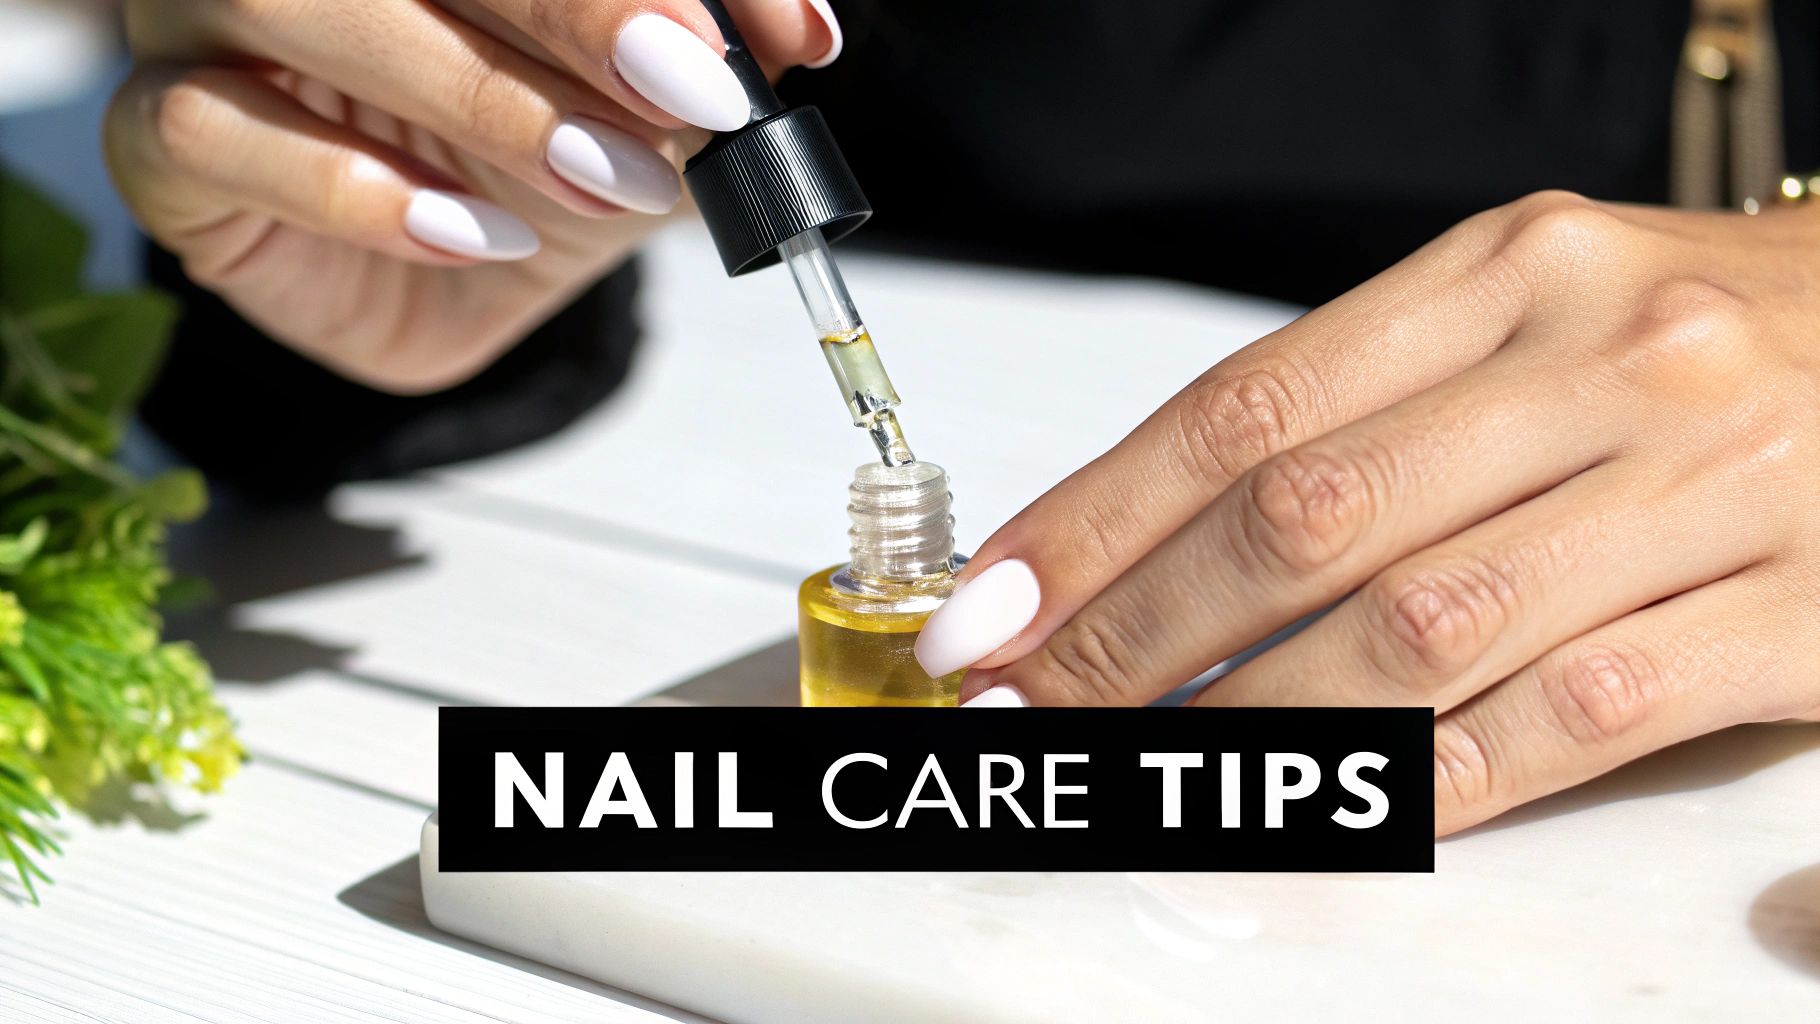
Daily hydration is non-negotiable for healthy nails and a lasting manicure. A good quality cuticle oil applied every day keeps the surrounding skin nourished and soft, preventing hangnails and keeping your manicure looking like you just left the salon.
Protecting the Signature Glaze
That gorgeous pearlescent finish is the whole point of glazed donut nails, so you want to protect it. Your final top coat does most of the heavy lifting, but you can give it a little boost about a week in to keep it looking pristine.
- Reapply Your Top Coat: Around the one-week mark, a great trick is to apply another thin layer of your high-shine, no-wipe top coat and give it a quick cure. This instantly refreshes that incredible gloss and adds an extra shield against minor scuffs and scratches.
- Be Mindful of Abrasives: This is the golden rule of nail care: treat your nails like jewels, not tools. Try to avoid using them to scrape off labels, open cans, or do anything else that could easily cause a chip or dull that beautiful chrome finish.
Making these small adjustments will help your glazed manicure hold onto its mirror-like shine and stay perfectly intact. Turning these into habits doesn't just preserve your current look; it's also a fantastic way to improve the long-term health and strength of your natural nails.
Got Questions About Glazed Donut Nails?
Even with a great tutorial, trying a new trend for the first time can leave you with a few questions. Getting those subtle details of the glazed donut look just right can feel a bit tricky initially, but don't worry—most of the common hiccups have simple fixes.
Think of this as your go-to troubleshooting guide. Whether you're wondering if you can skip the gel lamp or why your chrome finish looks more sparkly than smooth, I've got you covered. Let's walk through some of the questions I hear all the time.
Can I Get the Glazed Donut Look with Regular Nail Polish?
Yes, you absolutely can! You don't need a UV lamp or gel polishes to get in on this trend. While the process is a little different, the end goal is the same: creating that gorgeous, pearlescent sheen.
- It starts with a sheer base. You'll want to apply one or two thin coats of a milky nude or a soft, translucent pink varnish. The key is to keep it from looking like a solid, opaque colour.
- Next, create the "glaze" effect. Once your base is totally dry, you have a couple of options. The easiest way is to use a top coat specifically designed to have a pearlescent or iridescent finish. Alternatively, you can get a bit more hands-on by gently dabbing a fine, cosmetic-grade highlighter powder onto a tacky top coat, then sealing it all in with a final clear, glossy layer.
It might not have the exact mirror-like shine or the two-week durability of a gel manicure, but it’s a brilliant way to test out the look.
Why Does My Chrome Powder Look Glittery Instead of Smooth?
This is easily the most common frustration I see, and it almost always comes down to one of two things: the top coat you're using or your timing. That liquid-pearl, seamless finish depends on getting the conditions just right.
The real secret here is a 'no-wipe' gel top coat. This specific type of top coat is designed to cure without any sticky or tacky residue. If your top coat leaves a sticky layer, the chrome powder will just clump and stick to it, giving you a sparkly, glittery texture instead of that smooth, uniform sheen.
Timing is the other piece of the puzzle. You need to apply and burnish the chrome powder the second your nails come out of the lamp. That residual warmth from the curing process helps the powder melt right into the surface, which is what creates that flawless, mirror-like effect.
What Is the Best Base Colour for Classic Glazed Donut Nails?
The original look made famous by Hailey Bieber has a very specific foundation: a sheer, milky off-white or a barely-there, translucent pinky-nude. The idea is to create a "your-nails-but-better" vibe, where you can still see a hint of your natural nail underneath.
This translucency is what gives the manicure its delicate, ethereal quality. When you're shopping, look for polishes described as "jelly" or "sheer". A single, thin coat of a shade like OPI's Funny Bunny is the go-to for nailing this look perfectly. It gives just enough coverage to even out your nail bed without sacrificing that essential sheerness.
How Do I Stop My Glazed Donut Nails from Chipping?
Good durability always starts with great prep and a proper seal. Before you even think about polish, make sure your nails are completely clean, dehydrated, and have been lightly buffed. Any natural oils left on the nail plate will stop the polish from adhering properly.
But the most important step by far is to "cap the free edge." This is a non-negotiable professional technique. It just means running your brush along the very tip of your nail with every single coat—base coat, colour, and both top coats. This creates a protective seal that stops moisture and daily wear from getting under the polish, which is what causes almost all chipping and lifting.
At beautysecrets.agency, we believe that true beauty comes from high-quality, ethically sourced ingredients that care for your nails from the inside out. Explore our curated collections of clean and natural cosmetic brands to elevate your at-home manicure ritual. Discover the difference at https://beautysecrets.agency.


